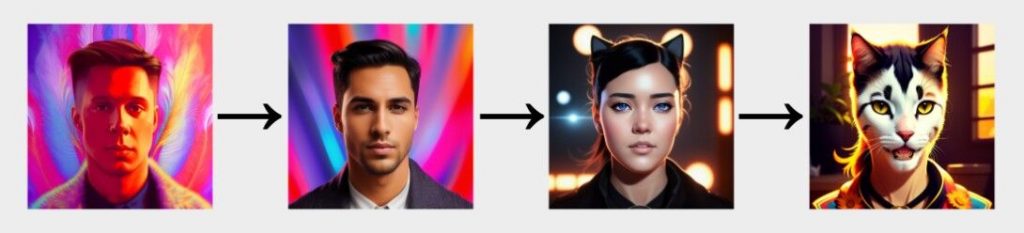
How to Generate Image Morphing Animation with ControlNet


Due to an earlier experiment conducted, we had the notion to use the ControlNet for morphing. Only then did we switch to using the depth2img model, which can create an image from a depth map, rather than the ControlNet. And the ControlNet can function not just in depth. This post has more information about the technique.

I’ll give you a quick rundown of the procedure. The denoising strength option, which impacts the number of steps during generation, is available to us if we generate an image in img2img. For example, with steps = 30 and denoising strength = 0.5, there will only be 15 steps remaining to create. This reasoning can be applied to animating the morph. You can morph any image; portraits are not the only ones that can be done.
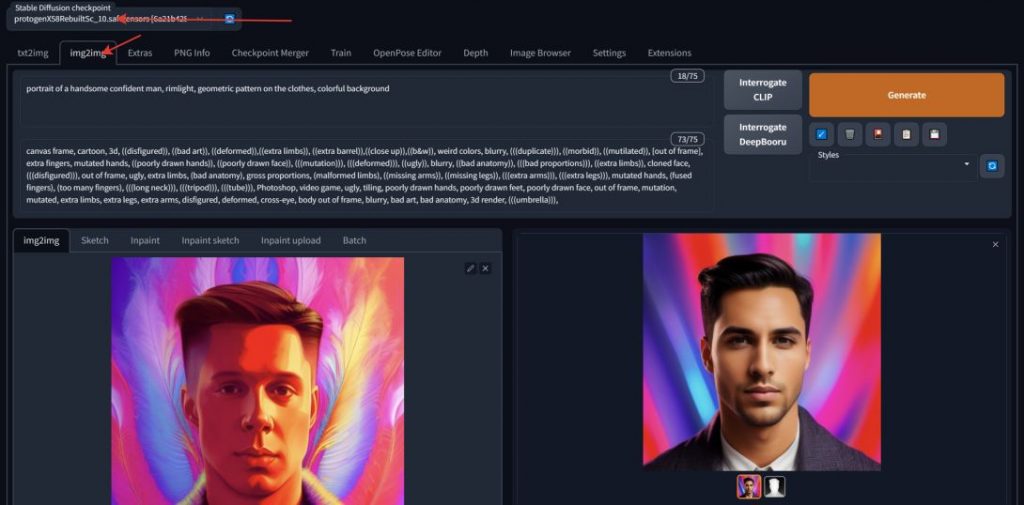
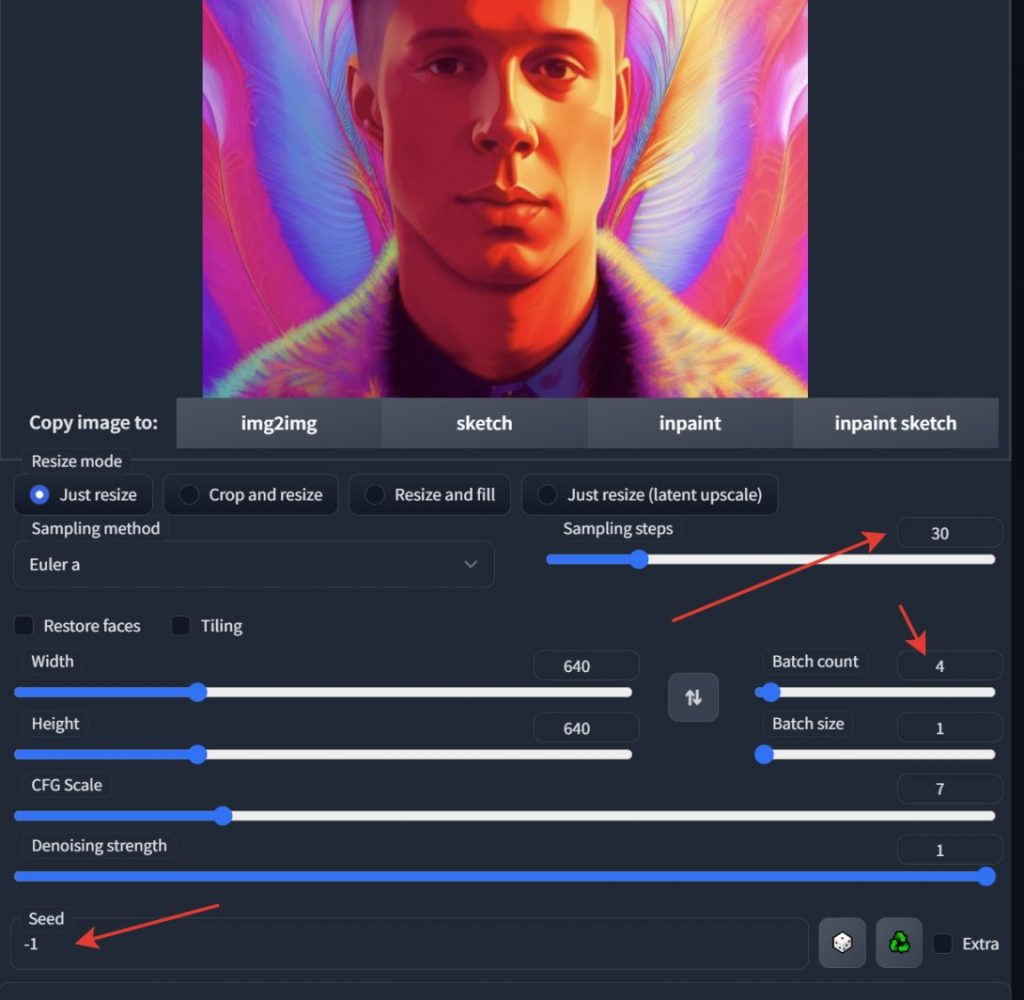
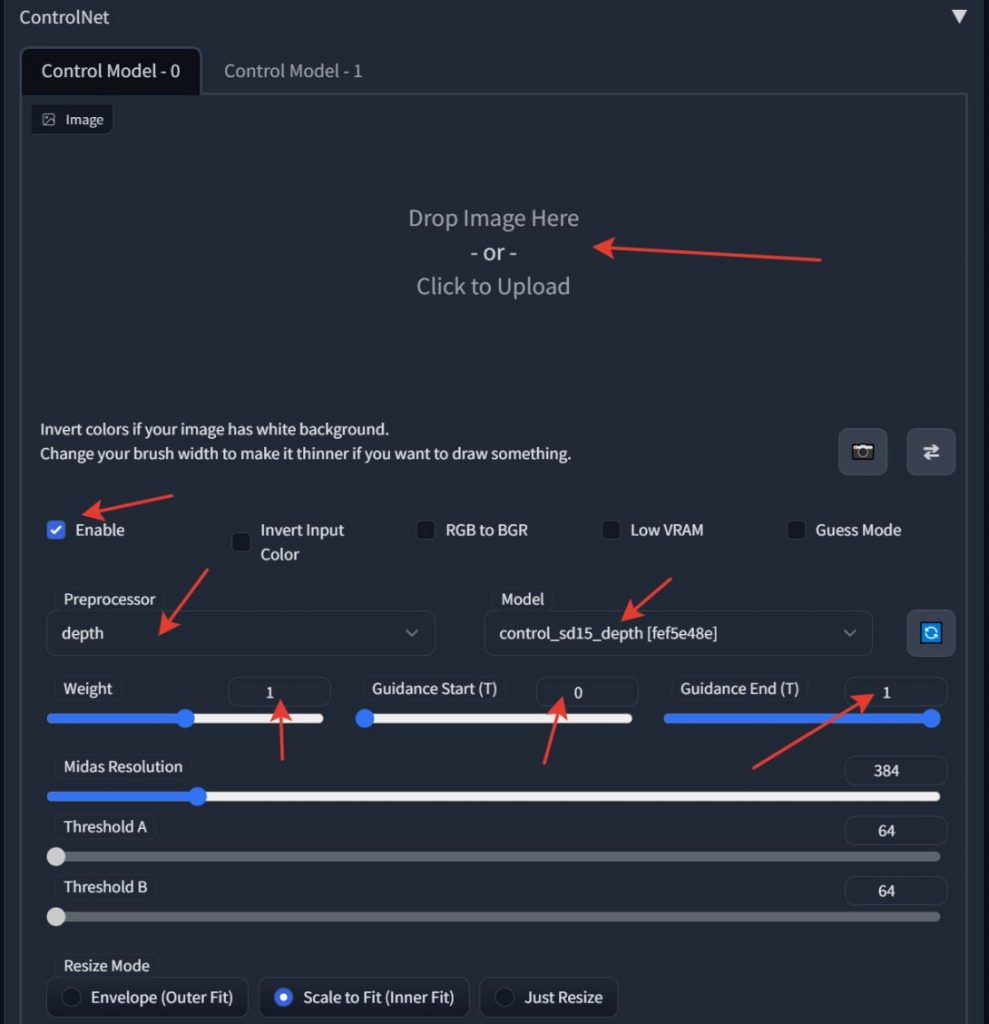
Take the original picture. Activate the ControlNet while leaving the picture box blank. Choose seed to be -1 to generate random tests; batch count influences their quantity. You can experiment with the guidance parameters, the weight of the received card, and the ControlNet mode. If you like the generation, drag it with the mouse to img2img and then repeat the process, looking for the image that the second image will eventually become. As every image is completed, the question of how to create an animation emerges. (For beginning, remember to set the batch count to 1 to avoid creating extra photos.)
We’ll utilize an intriguing solution right now, but I’ll talk about its shortcomings later.

The XYZ plot will be used; you must choose it from the Script list. It will enable us to create not just the final image but also the transition from the source image.

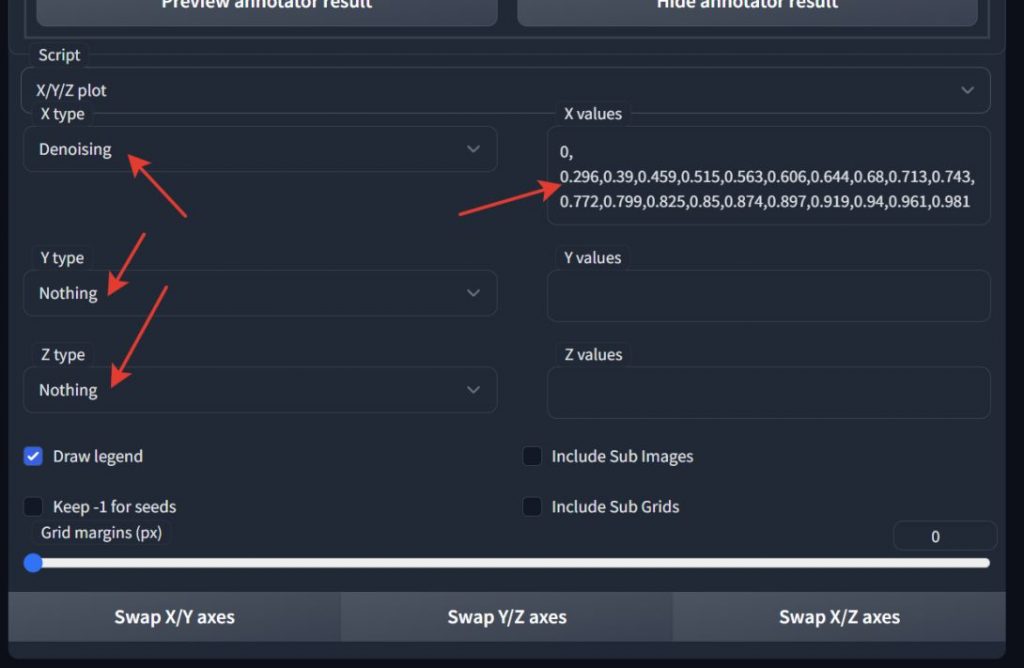
X values in we put in the line that reads:
0.0.296.0.39.0.459.0.515.0.563.0.606.0.644.0.68.0.713.0.743.0.772.0.799.0.825.0.85.0.874.0.897.0.919.0.94.0.961.
This means that when the generation begins, we will receive 21 pictures instead of just one (the number of values separated by commas). Why is this line there? For instance, it can appear differently.
This format makes it simpler to understand: you request 20 images from the automated and ask it to demonstrate how denoising will impact the outcome for values ranging from 0 to 1. The drawback of the second option is that it results in a linear change in values, because of the characteristics of the denoise, it does not appear to be realistic morphing. Near zero numbers almost have no effect on the outcome. and at levels greater than 0.5, , it starts to influence very noticeably.
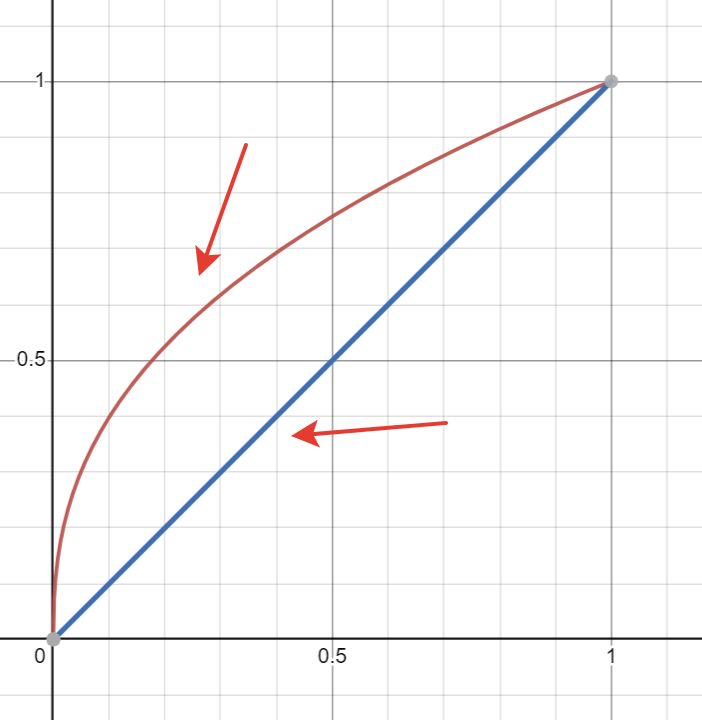
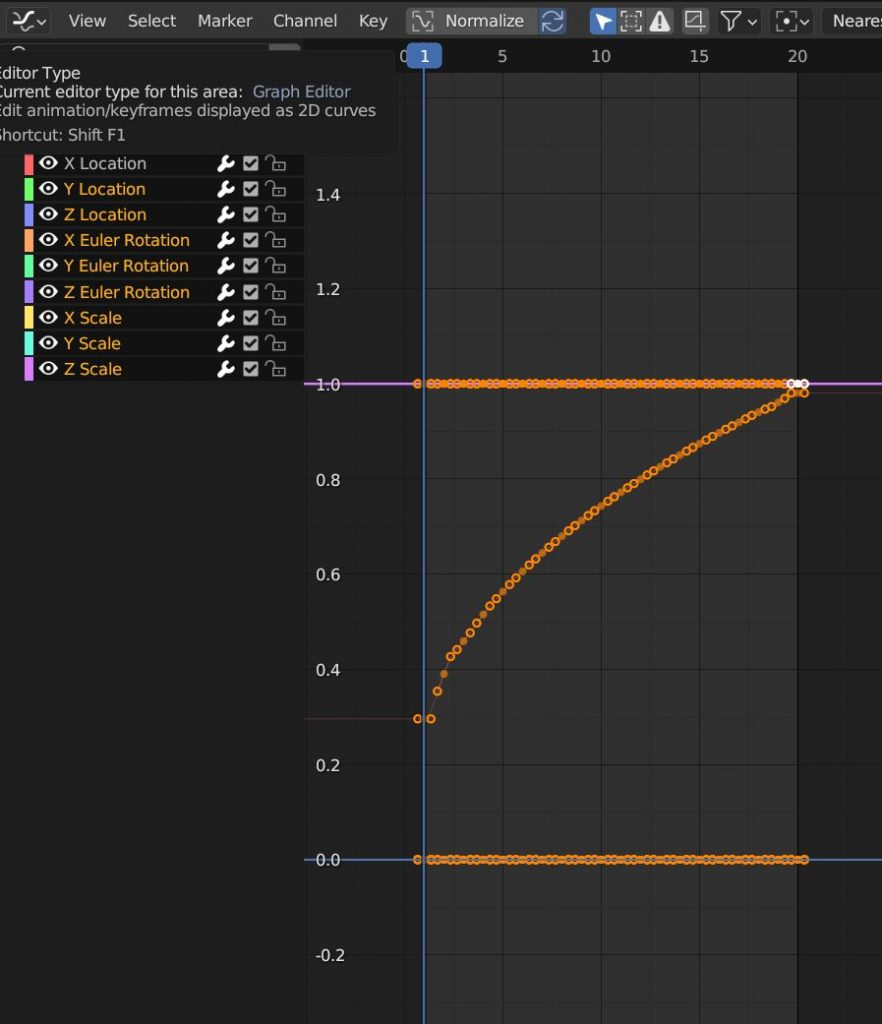
As a result, the first line is a curve of the type x.4, or x raised by 0.4. A straight, linear function and a curved, which will produce a more accurate output, are contrasted in the image. You can use a blender to create such a string.
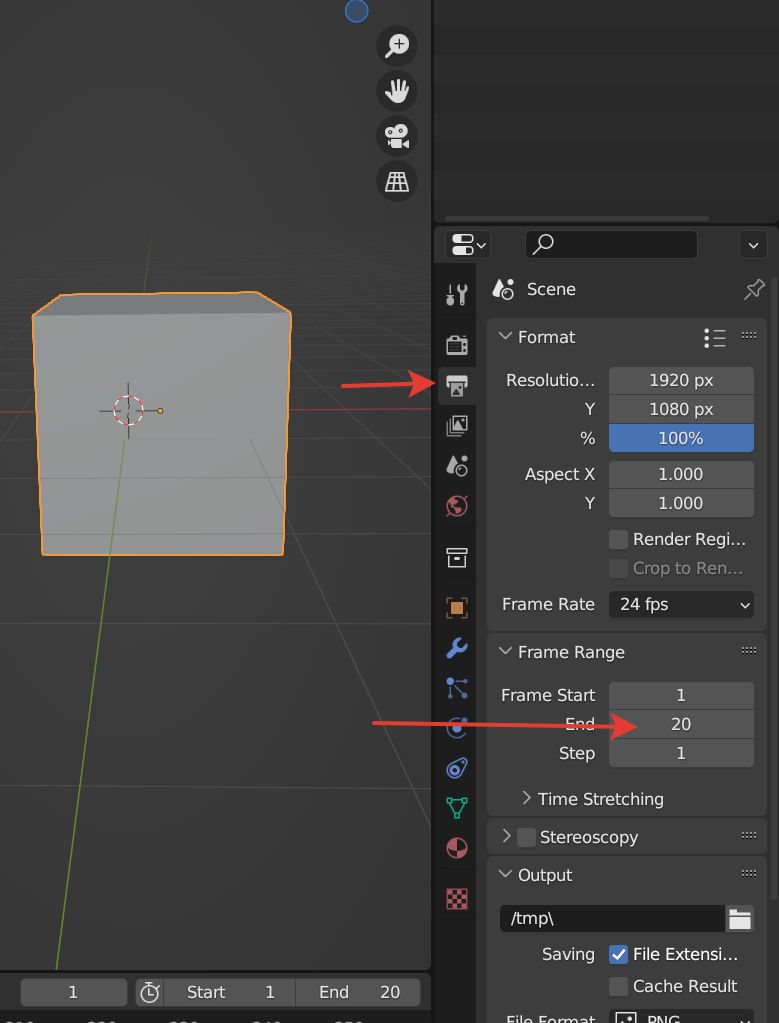
You must choose the amount of frames for the transition before creating your line. It is editable in the project settings.
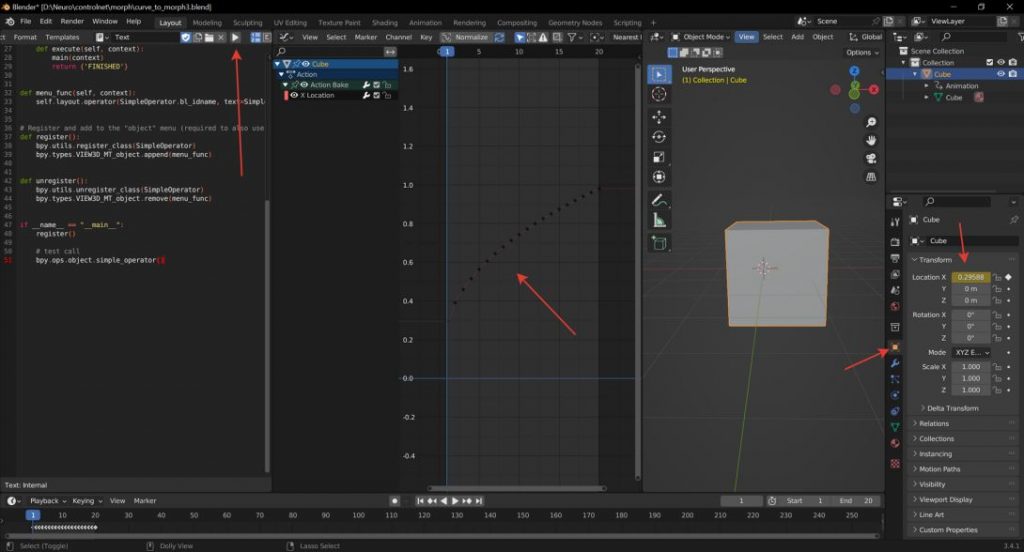
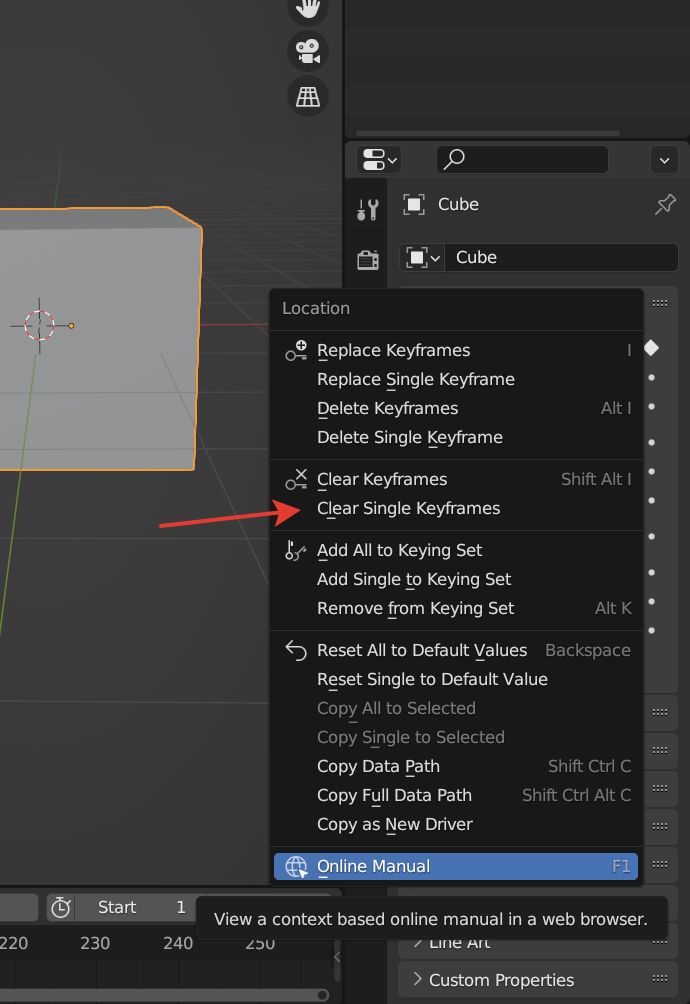
You must perform multiple steps in order to obtain a line. First, experiment with the curve’s shape. To achieve this, select “Delete Keyframes” from the context menu of the animation parameter.
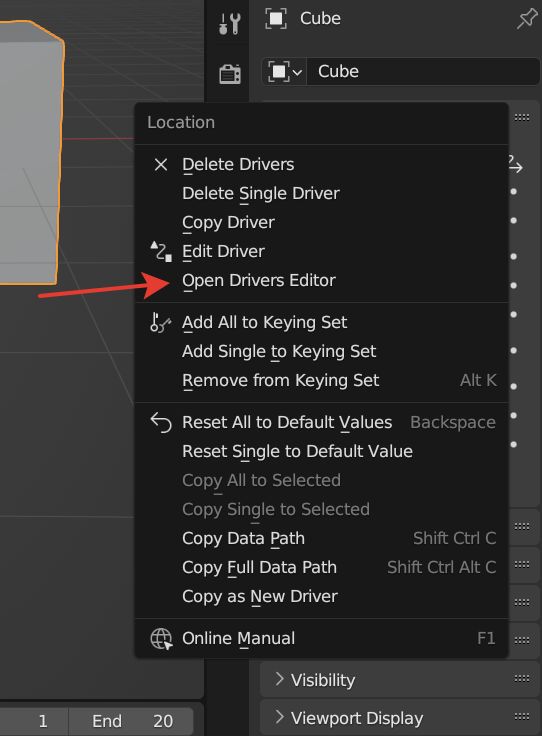
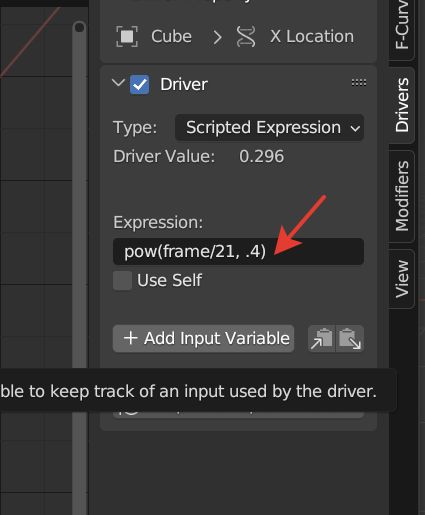
Here is the formula for obtaining the curve; the parameter turned blue, indicating that the driver is operating in it.
You can fiddle around with the value here. 4. But, avoid going too low. frame/21 denotes a value shift from 0 to 1 at frame 0 to frame 21. Only values between 1 and 20 frames are left.
Nonetheless, the keys are not the driver. They must first be prepared. To accomplish this, click Object > Animation > Bake Action in the 3d window and then click OK.

However, this will affect all possible keys of the object, and they should be deleted. Select everything except the first line and press X on the keyboard (the mouse should be located under the list).
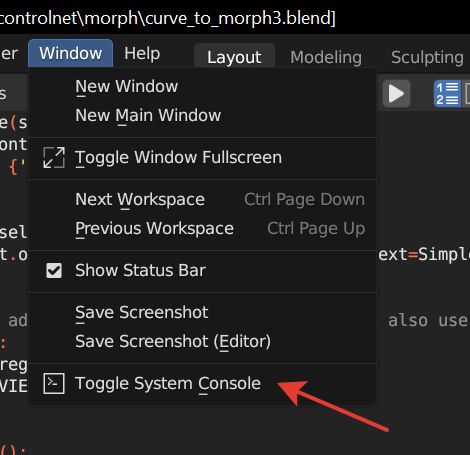
And now, to get the line on the left side of the screen, click on play and open the console window.
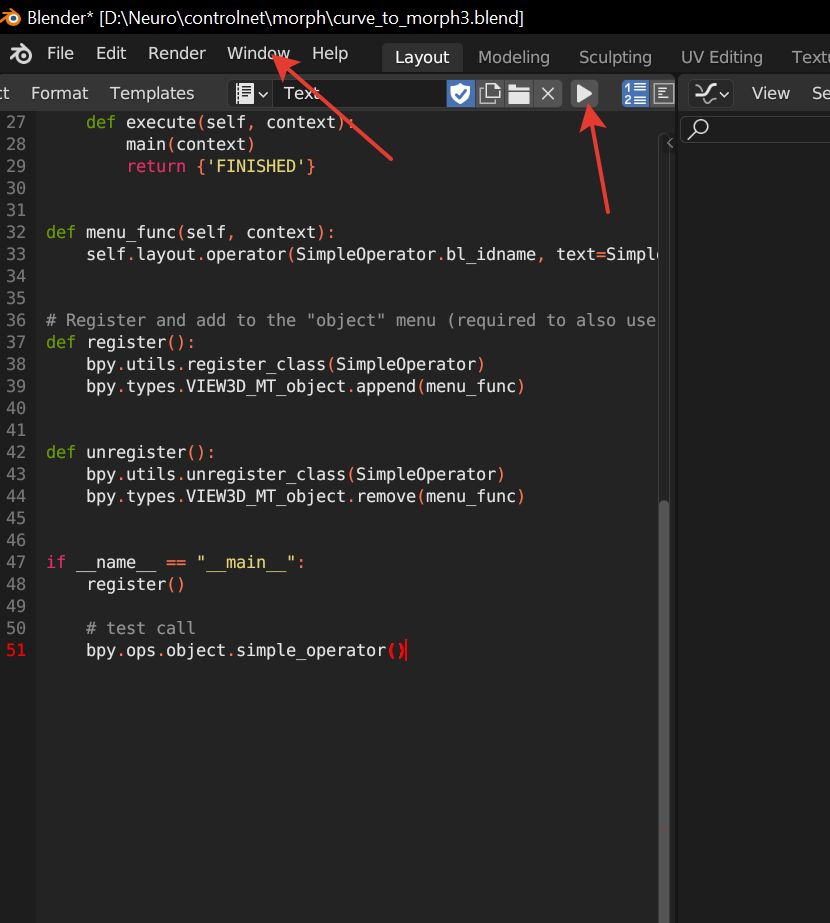
Got a string that can be copied.

Now to make the animation, you need to do this process separately for each picture position that was made at the beginning and then assemble it into animation in some video editor.
Yes, the process is not yet automated, but you can fully customize everything for yourself. You can change the generation model and the ControlNet model and mode, enable or disable the preprocess, or anything else you like. The main thing is to not lose good results and then repeat everything correctly to create animation.
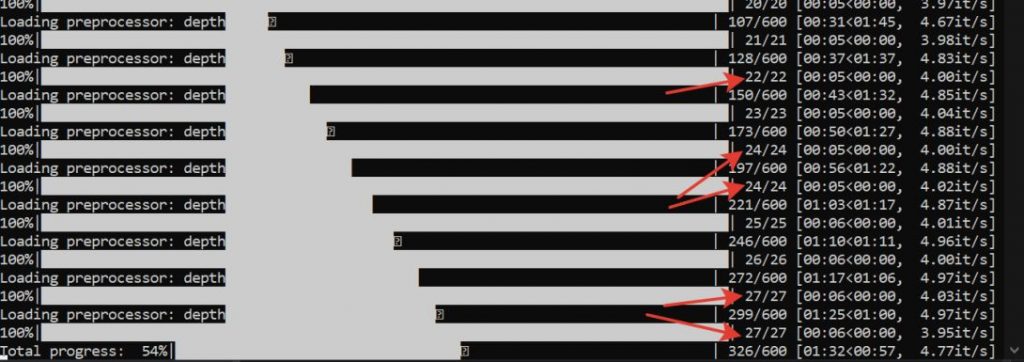
Disadvantages of technology — you should not lay a lot of groundwork for the transition. We wrote above that denoise affects the number of steps. It may turn out that the output will duplicate pictures since several denoise values will be within the same number of steps. Their number can be observed in the automatic console.
This technology can be used in conjunction with interpolator retarders, that is, sending the animation to complete the missing frames; this will give smoother changes.
Read more related articles:
Disclaimer
In line with the Trust Project guidelines, please note that the information provided on this page is not intended to be and should not be interpreted as legal, tax, investment, financial, or any other form of advice. It is important to only invest what you can afford to lose and to seek independent financial advice if you have any doubts. For further information, we suggest referring to the terms and conditions as well as the help and support pages provided by the issuer or advertiser. MetaversePost is committed to accurate, unbiased reporting, but market conditions are subject to change without notice.
About The Author
Damir is the team leader, product manager, and editor at Metaverse Post, covering topics such as AI/ML, AGI, LLMs, Metaverse, and Web3-related fields. His articles attract a massive audience of over a million users every month. He appears to be an expert with 10 years of experience in SEO and digital marketing. Damir has been mentioned in Mashable, Wired, Cointelegraph, The New Yorker, Inside.com, Entrepreneur, BeInCrypto, and other publications. He travels between the UAE, Turkey, Russia, and the CIS as a digital nomad. Damir earned a bachelor's degree in physics, which he believes has given him the critical thinking skills needed to be successful in the ever-changing landscape of the internet.
More articles
Damir is the team leader, product manager, and editor at Metaverse Post, covering topics such as AI/ML, AGI, LLMs, Metaverse, and Web3-related fields. His articles attract a massive audience of over a million users every month. He appears to be an expert with 10 years of experience in SEO and digital marketing. Damir has been mentioned in Mashable, Wired, Cointelegraph, The New Yorker, Inside.com, Entrepreneur, BeInCrypto, and other publications. He travels between the UAE, Turkey, Russia, and the CIS as a digital nomad. Damir earned a bachelor's degree in physics, which he believes has given him the critical thinking skills needed to be successful in the ever-changing landscape of the internet.